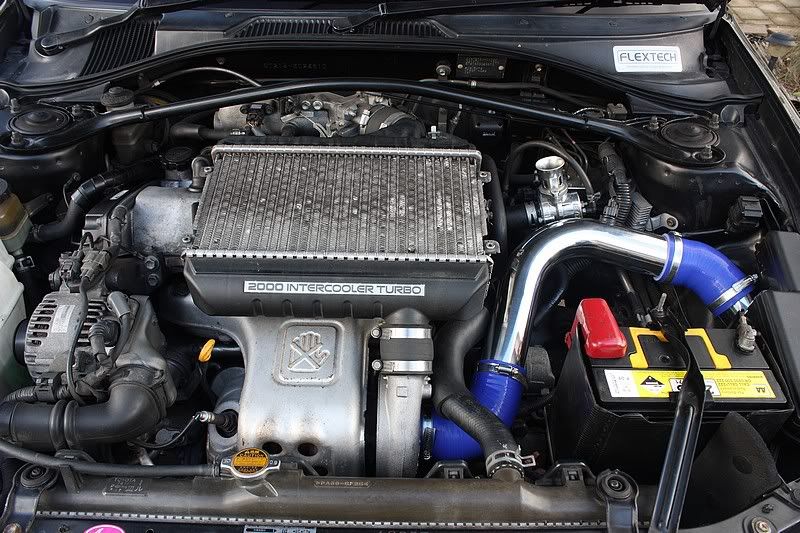
A few weeks ago I made and installed a custom cold air intake for my brother's 1998 Caldina GT-T. It made a noticeable difference in performance and now makes an awesome fluttering noise when easing off the throttle. I'd recommend it to everyone with a 3S-GTE engine. He originally had a K&N panel filter in the stock airbox but this does a much better job. There also doesn't seem to be any hesitation/lag from the turbo anymore after this install.
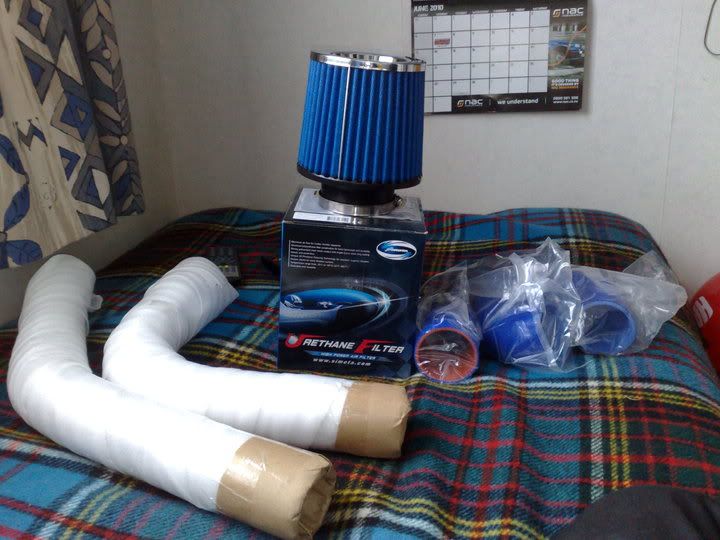
The parts I used were:
* 1x 90-degree 2.5" alloy pipe (600mm long)
* 1x 45-degree 2.5" alloy pipe (600mm long)
* 1x 90-degree silicone reduced (3" to 2.5")
* 1x 45-degree silicone joiner (2.5" to 2.5")
* 7x hose clamps
* Simota pod filter
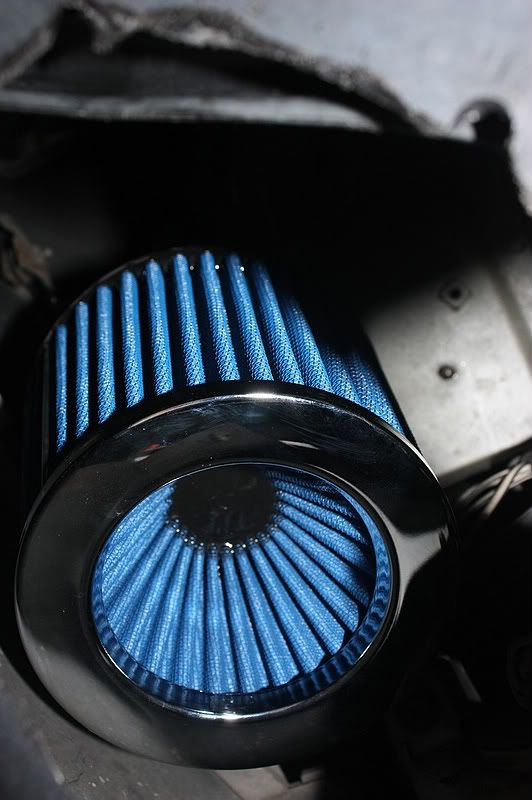
If anyone wants me to write a DIY just let me know. Here are some photos (it was hard to take a photo of where the pod filter sits under the front bumper, but it's protected from the rain and gets excellent airflow due to the round hole cut in the plastic splash tray) -

Reply 1 : 1998 Caldina GT-T Custom Cold Air Intake (CAI) Install *PICS*
Hi Kiwi-Corolla,
Did you end up putting together a DIY for this?
Am looking to do this mod to my 2000 model Caldina GT-T.
Any help would be gratefully appreciated!
Cheers,
Steve
Reply 2 : 1998 Caldina GT-T Custom Cold Air Intake (CAI) Install *PICS*
|
Originally Posted by deevE8 
Hi Kiwi-Corolla,
Did you end up putting together a DIY for this? Am looking to do this mod to my 2000 model Caldina GT-T. Any help would be gratefully appreciated! Cheers, Steve |
I've written up a complete DIY for this particular modification. Please let me know if you have any questions.
I didn't take step by step pictures of the process as I was trying to get it done before it rained, but I can remember each and every step I took so I'll be explain it as best as I can.
The things you'll need are:
- 1x 90-degree 2.5" alloy intercooler pipe (600mm long)
- 1x 45-degree 2.5" alloy intercooler pipe (600mm long)
- 1x 90-degree silicone reducer (3" - 2.5")
- 1x 45-degree 2.5" silicone joiner
- 7x hose clamps
- Pod filter
Remove the battery: First you'll need to remove the battery by taking off the battery clamp. There is one 10mm bolt on the radiator support beam and one 10mm nut on the battery clamp itself. Once it's off, simply remove the battery terminals and lift the battery out. You can now remove the battery tray underneath.
Remove the factory air resonator box: The air resonator box is a large black box which muffles the noise of the intake. It sits inside the guard (fender) and needs to be removed in order to install your custom CAI. You'll need to jack the car up, remove the front passenger's side wheel, undo the various bolts to remove the plastic splash-tray, and undo the bolts holding in the factory resonator box. Once the bolts are removed, the air resonator box will slide out from underneath.
Remove the factory airbox and filter: Unclip the hooks from the sides of the airbox, pull the air temperature sensor out (closest to the firewall), remove the rubber induction pipe leading to the turbo by undoing the hoseclamps, pull the plastic airfeed off leading to the pipe, and then lift the top of the airbox off. This will now expose the air filter. Take the filter out and you'll see some 10mm bolts underneath. Take these out and then wiggle the bottom section of the airbox away from the intake snorkel.
Remove the fusebox and intake snorkel: In order to remove the intake snorkel that runs from behind the headlight to the factory airbox, you must remove the rectangular shaped fuse box. The fuse box is held in by two 10mm bolts, one on each side. Once the bolts are removed, slightly move the fusebox towards the engine, enough so that it lifts straight up and out of the way. You will now be able to have full access to the intake snorkel. The snorkel is held in by two plastic clips and one 10mm bolt closest to the airbox side. Simply undo the 10mm bolt and pull the plastic clips off. The snokel will lift out and give you plenty of room to route your alloy pipe.
Aligning and cutting of the alloy pipes: You are now ready to align your pipes so that you can cut them to fit. Fortunately, if you use 600mm piping, you only have to make 3 cuts. The best thing to do is to lay the pipes in the engine bay and overlap the ends of each pipe so you know how much to cut off. Mark it with a marker pen to know where the cut should be. Do the same for the pipe that sits in the guard (fender) so that the pod filter doesn’t sit too low. The best way is to clamp a hose clamp to the piping so you can be sure that your cut is perfectly straight. Get your hacksaw and cut through the pipe, getting rid of any rough or uneven edges with a metal file afterwards. Once all of the pipes are cut to the right length, it will now be time to drill the hole for your intake air temperature sensor.
Drilling the hole for the intake air temperature sensor: You will need to drill a hole in the alloy pipe for your intake air temperature sensor. Put a small mark on the pipe where the sensor will sit nicely and then place a piece of masking tape over the marking. This will ensure that the drill piece won’t slip while drilling and prevent scratchs to the pipe. Start with the smallest drill piece and work your way up. Once the hole is big enough, use a rotary tool (such as a Dremel) with a grinding stone to make the hole bigger. Alternatively you can just use a larger drill piece to make the hole larger or use a small metal file. Gradually make the hole larger so that it’s big enough to fit the rubber bung from your standard airbox. It pays to check the hole size every 20-seconds or so to make sure that you’re not making it too big (this is very important).
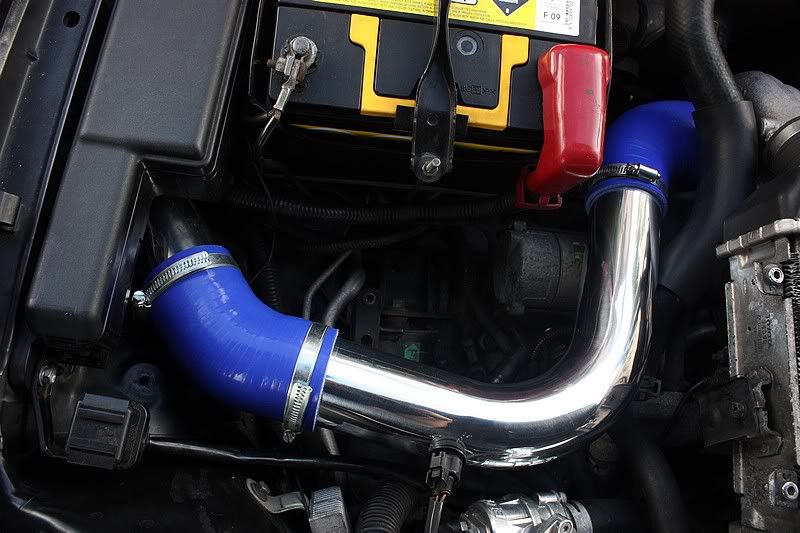
Installing the pipes: Finally, you can now install the pipes and finish the installation. Put the silicone reducer on the end of the pipe that sits closest to the motor and slide it onto the snorkel of the turbo. Put a silicone joiner on the other end of this pipe and connect the second pipe. The best way to get the second pipe into the engine bay is to bolt the pod filter on first and slide it up from the bottom (splash tray side). Once secure, cut a hole in the plastic splash tray so that air can gush up there and into the pod filter. Secure the hose clamp, push the intake air temperature sensor in and you'll be ready to start the engine.
You've now made your own custom cold air intake for your Caldina. Enjoy the increased performance and the awesome flutter sound achieved from this modification

Reply 3 : 1998 Caldina GT-T Custom Cold Air Intake (CAI) Install *PICS*
I know I've already hit the "Thanks" button but just had to say this is a fantastic write up!
I'd already managed to get the images (thanks to the wonders of Google cache!) but ta for reposting them anyway. I have a feeling I'm not going to be 100% certain on the pod placement until I actually get under there and take a look.
How's your brother finding his Caldina? Thinking of doing any other mods to it?
My budget's pretty limited so am trying to figure out the cheapest ways to get some extra grunt (the aim being to get her from 190kW to just over 200kW) to make up for the fact (if that's possible) that she's running the tiptronic gearbox.
Anyway, cheers again!
Steve
PS. Is the fluttering sound loud enough that I'm going to get some undue attention from the boys in blue?
Reply 4 : 1998 Caldina GT-T Custom Cold Air Intake (CAI) Install *PICS*
|
Originally Posted by deevE8
I know I've already hit the "Thanks" button but just had to say this is a fantastic write up!
I'd already managed to get the images (thanks to the wonders of Google cache!) but ta for reposting them anyway. I have a feeling I'm not going to be 100% certain on the pod placement until I actually get under there and take a look. How's your brother finding his Caldina? Thinking of doing any other mods to it? My budget's pretty limited so am trying to figure out the cheapest ways to get some extra grunt (the aim being to get her from 190kW to just over 200kW) to make up for the fact (if that's possible) that she's running the tiptronic gearbox. Anyway, cheers again! Steve PS. Is the fluttering sound loud enough that I'm going to get some undue attention from the boys in blue? |

Yeah you can't really get an idea on the pod placement until you're under there. what I did was put the pipe in place without the filter on it, and then used a marker pen (vivid) to draw a line where I wanted the filter to sit. I made a custom CAI for my Corolla too, some months before I did my brother's, and I've never had a problem with water in the intake etc, so no worries there.
The fluttering sound achieved from the CAI is very subtle, and usually can only be heard when you're going slowly around a corner and let your foot off the accelerator It's a nice quiet flutter, not like some of those VR4s you see boosting around the streets, haha. It'll be nothing that will get you in trouble with the 5-0

My brother is loving his Caldina. He put a Mine's ECU in it a little while ago and that made a huge difference. The power increase from that one mod was phenomenal. The boost level remained the same, but the acceleration and engine response greatly improved. It also raised the rev limiter and removed the speedcut. His is a tiptronic too, so this was a big help. If you can find one of these ECUs then I'd highly suggest getting one. It's 100% plug-and-play.
There's a lot you can do to the almighty 3S-GTE, but it depends how much you've got to spend. My brother is going to be putting a 3" exhaust on in the near future, along with a turbo and exhaust manifold upgrade, so I'll let you know what it makes on the dyno. When it was completely stock (apart from wheels and a BOV) we took it on the dyno and it made 165kW at the wheels.
I made a video on the day. I wasn't allowed to get in front of the car unfortunately (some health and safety crap) but it literally sounded like a jumbo jet when it hit boost
|
You Tube |
|
|
|
|
Reply 5 : 1998 Caldina GT-T Custom Cold Air Intake (CAI) Install *PICS*
Just spoke to my mechanic about the CAI (was there because I've had some minor surging after having my manifold modified/repaired).
He reckons it's a top idea, although in my case, I'll need a second hole between the turbo and the air flow sensor (for the BOV outlet) as I'm running the stock BOV. I don't plan to replace the BOV either as power to be gained is minimal (and as I need my car for work I'm trying to reduce my chances of getting defected!).
He also mentioned the Mines ECU could be risky as a lot of ECU's are tuned in the Jap market on higher octane fuels etc. If this means shortening the life of my engine I'd be very cautious (see comment about this being my work car!).
Thanks again,
Steve
PS. That's an impressive dyno run! Everyone that's been in the car has been impressed. It's fairly tame looking (bar the intercooler intake) but goes quite nicely!
Reply 6 : 1998 Caldina GT-T Custom Cold Air Intake (CAI) Install *PICS*
|
Originally Posted by deevE8
Just spoke to my mechanic about the CAI (was there because I've had some minor surging after having my manifold modified/repaired).
He reckons it's a top idea, although in my case, I'll need a second hole between the turbo and the air flow sensor (for the BOV outlet) as I'm running the stock BOV. I don't plan to replace the BOV either as power to be gained is minimal (and as I need my car for work I'm trying to reduce my chances of getting defected!). He also mentioned the Mines ECU could be risky as a lot of ECU's are tuned in the Jap market on higher octane fuels etc. If this means shortening the life of my engine I'd be very cautious (see comment about this being my work car!). Thanks again, Steve PS. That's an impressive dyno run! Everyone that's been in the car has been impressed. It's fairly tame looking (bar the intercooler intake) but goes quite nicely! |
Yeah the Japanese tend to run their cars on high octane fuel. My brother strictly only puts 98 octane in his car. If you're only running 95 octane then it might not be such a good idea.
Feel free to post some pics of your Caldina sometime. I'd love to see them. I've been trying to get my brother to make a CarDomain page, but he hasn't done it yet. He's got a few videos on YouTube of his Caldina doing some 0-100 and 0-160 times. You can check out his channel here. He plans on taking it to the drags in coming weeks, so hopefully it posts a decent time.
Looking forward to seeing what the completed CAI looks like

Reply 7 : 1998 Caldina GT-T Custom Cold Air Intake (CAI) Install *PICS*
|
Originally Posted by Kiwi-Corolla
Oh yes, didn't realise that you would have to use the standard BOV. Is it against the law to run a BOV vented to the atmosphere in your state?
Yeah the Japanese tend to run their cars on high octane fuel. My brother strictly only puts 98 octane in his car. If you're only running 95 octane then it might not be such a good idea. Feel free to post some pics of your Caldina sometime. I'd love to see them. I've been trying to get my brother to make a CarDomain page, but he hasn't done it yet. He's got a few videos on YouTube of his Caldina doing some 0-100 and 0-160 times. You can check out his channel here. He plans on taking it to the drags in coming weeks, so hopefully it posts a decent time. Looking forward to seeing what the completed CAI looks like |
I always run 98 whenever possible but every now and then I get caught out and have to use 95.
Will def post some piccies. Just gotta pick a time when it's clean...is hard keeping a black car clean!
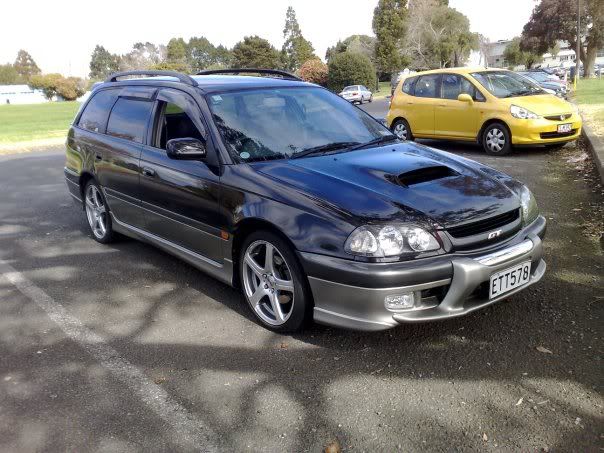
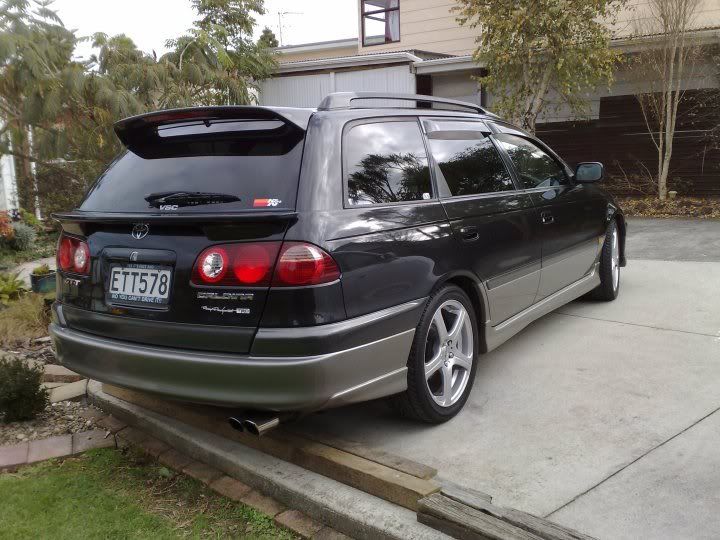
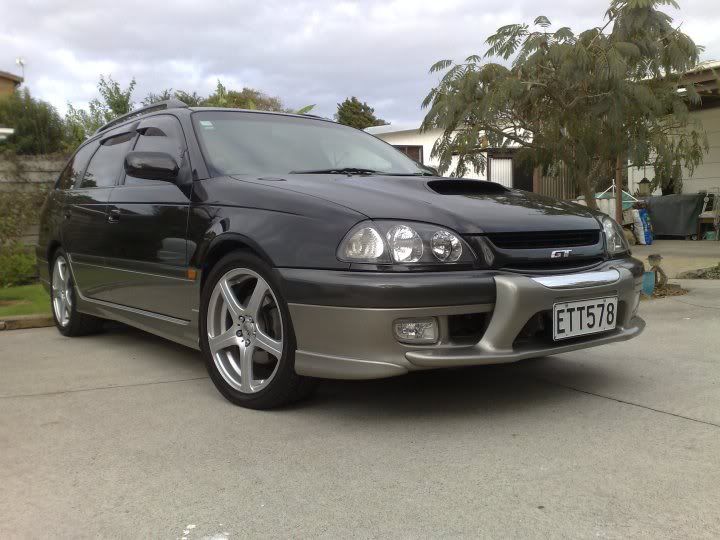
Here's some old pics of it on Facebook: http://www.facebook.com/album.php?ai...d=153148826564 (note that these were taken by the dealer I bought it from and that the head unit that had been stolen in these pics has been replaced by an Alpine)
Reply 8 : 1998 Caldina GT-T Custom Cold Air Intake (CAI) Install *PICS*
|
Originally Posted by deevE8
Yep, and apparently the police aren't well trained in what the diff is so people have been known to be defected even for a factory BOV (non-atmo)!
I always run 98 whenever possible but every now and then I get caught out and have to use 95. Will def post some piccies. Just gotta pick a time when it's clean...is hard keeping a black car clean! Here's some old pics of it on Facebook: http://www.facebook.com/album.php?ai...d=153148826564 (note that these were taken by the dealer I bought it from and that the head unit that had been stolen in these pics has been replaced by an Alpine) |
Your Caldina is looking nice by the way! The rear lip is cool. My brother's one never came with one, but he bought one for it about a month ago. It's sitting in the garage at the moment. I'll be sure to show him your pics
Here's a quick one of his:
Reply 9 : 1998 Caldina GT-T Custom Cold Air Intake (CAI) Install *PICS*
|
Originally Posted by Kiwi-Corolla
That sucks about the Police. I hope it doesn't ever get like that here. Good to hear that you run 98 too. Are there many stations with crappy ethanol over there?
Your Caldina is looking nice by the way! The rear lip is cool. My brother's one never came with one, but he bought one for it about a month ago. It's sitting in the garage at the moment. I'll be sure to show him your pics |
My car is the "facelift" version I think, like a Series 2 or something. Hence the different body kit.
Am slowly removing the sun shades from the windows because (a.) one was damaged when the car was broken into during shipping (b.) at freeway speeds [I live in the hills here and go up and down a freeway with 110km/h limit] they create tonnes of annoying wind noise!
Will keep you posted!
And thanks @gener!
Reply 10 : 1998 Caldina GT-T Custom Cold Air Intake (CAI) Install *PICS*
Kick ass, that sounds preaty scary, awsome car!
Reply 11 : 1998 Caldina GT-T Custom Cold Air Intake (CAI) Install *PICS*
|
Originally Posted by gener
nice pics guys
|
|
Originally Posted by deevE8
The only stations I know of here that have Ethanol "enhanced" fuel are some independents and Liberty branded stations. I'd rather pee into my fuel tank after a big night on the Absinthe than put that stuff in my car.
My car is the "facelift" version I think, like a Series 2 or something. Hence the different body kit. Am slowly removing the sun shades from the windows because (a.) one was damaged when the car was broken into during shipping (b.) at freeway speeds [I live in the hills here and go up and down a freeway with 110km/h limit] they create tonnes of annoying wind noise! Will keep you posted! And thanks @gener! |
By the way, did you get around to installing the CAI?
|
Originally Posted by bkftl
Kick ass, that sounds preaty scary, awsome car!
|
Reply 12 : 1998 Caldina GT-T Custom Cold Air Intake (CAI) Install *PICS*
|
Originally Posted by Kiwi-Corolla
Thanks man
Haha, I think I'd rather do that too! Yeah yours is the facelift version, with the different tail lights. Have you seen the LCD screen that goes between the clock and the vents in the middle of the dash? Some models came with them, whereas others had the flip-up storage compartment. My brother has got one of those screens in his, and it shows what the fuel consumption is etc. Pretty cool thing to have. I'll post photos if you like. By the way, did you get around to installing the CAI? |
The CAI has gone on the back burner for a while as my mechanic and I are now trying to sort out a surging issue it's developed after the modified exhaust manifold went in. At low speeds it's not noticeable but accelerating hard over about 80km/h (something I do regularly living off the freeway) it surges in short bursts. Feels like the ECU is detecting an issue although the engine light doesn't come on. Annoyingly, the one chance I've had so far to take it to the mechanic, it performed perfectly!!! Argh! It's misbehaved consistently since...
Naturally not keen to change anything until this problem has been fixed as it's VERY annoying and just slightly concerning! Strangely, even with this surging issue, she still goes hard...just not comfortable for people in the car (the sensation is like trying to go faster on a bicycle by shifting your weight back and forward).
Hope you had a great Christmas and new year?
Reply 13 : 1998 Caldina GT-T Custom Cold Air Intake (CAI) Install *PICS*
|
Originally Posted by deevE8
Have seen the ones with an LCD screen (not in IRL though). Even thought about trying to source one. I do want something to fill the space where the digital clock is. Mine hasn't worked from day one (probably buggered from the shoddy job the thieves did when removing the head unit).
The CAI has gone on the back burner for a while as my mechanic and I are now trying to sort out a surging issue it's developed after the modified exhaust manifold went in. At low speeds it's not noticeable but accelerating hard over about 80km/h (something I do regularly living off the freeway) it surges in short bursts. Feels like the ECU is detecting an issue although the engine light doesn't come on. Annoyingly, the one chance I've had so far to take it to the mechanic, it performed perfectly!!! Argh! It's misbehaved consistently since... Naturally not keen to change anything until this problem has been fixed as it's VERY annoying and just slightly concerning! Strangely, even with this surging issue, she still goes hard...just not comfortable for people in the car (the sensation is like trying to go faster on a bicycle by shifting your weight back and forward). Hope you had a great Christmas and new year? |
My brother has a spare LCD screen, but it has some dead pixels on it. Still completely readable though, he just replaced it with another one because he got it cheap.
Let me know how you get on with solving the surging issue
Reply 14 : 1998 Caldina GT-T Custom Cold Air Intake (CAI) Install *PICS*
|
Originally Posted by Kiwi-Corolla
Damn, sorry to hear that. Hope it turns out to be something simple. Yeah I had a great Christmas and New Year. I hope yours went well too
My brother has a spare LCD screen, but it has some dead pixels on it. Still completely readable though, he just replaced it with another one because he got it cheap. Let me know how you get on with solving the surging issue |
Hols were good, got used to sleeping in though so the mornings this week were extra tough!
Just the LCD screen though? I'd still need the pod to fill the rest of the space?
Will keep you posted. Am keen to do the CAI but first things first!
No comments:
Post a Comment